Bank statements are required for all personal loan applications and auto loan applications for tier 3 or 4 customers. Refer to the Payslip and Bank Statements Requirements table for a full breakdown.
On the Documents tab, you can upload the required documents and choose your preferred method for providing bank statements.

For Payslips or Other Documents: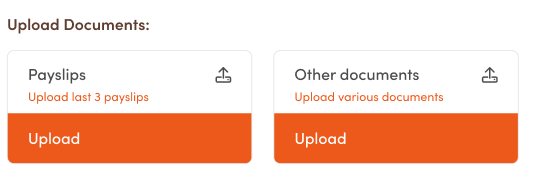
For Bank Statements, choose one of the following methods — only one is required:
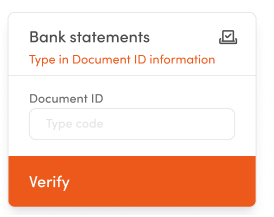
Option 1: Use the client's illion Bank Statement ID code
This option applies to clients who have already authorised their bank statements to be stored via illion's Bank Statements portal and have an illion Bank Statement ID code. NOW Finance will securely retrieve the bank statements using the illion Bank Statement ID code.
- Enter your client's unique code in the Document ID field to begin the retrieval process.
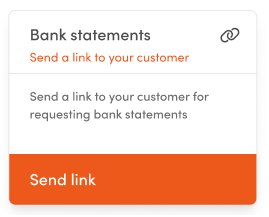
Option 2: Send an illion Bank Statement request
This option has no pre-requisites and will submit a request to the customer to securely share access to their bank statements.
- Click the Send Link button. This will trigger an automated email and SMS to your client.
- Once your client clicks the link within the email/SMS, they will access their Loan Progress screen. Your client can select Let's Go 🡢 button under the Bank Statements section to access the illion Bank Statements tool.
- Your client will need to select or search for their banking institution, before entering their banking user name and password. illion Bank Statements will perform a read-only retrieval of the bank statements selected by your client.

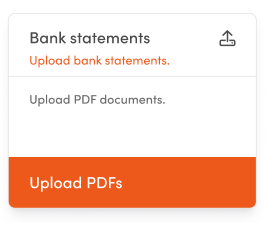
Option 3: PDF file upload
This option applies for both payslip and bank statement uploads.
For bank statements, this is the least preferred option and requires a manual review of each PDF file, generally leading to longer credit assessment timeframes.
- Click on the Upload PDFs button. Select or drag and drop the documents you would like to submit for review.
- Once successfully uploaded, the document will appear under the Uploaded Documents heading. Click the Upload button to add additional documents.

- When all documents are uploaded and ready for submission, click the Submit Application. Our credit team will review the documents and respond via email.